
If you have a crack in a driveway, garage slab, basement floor, or walkway, you already know the annoying part is not the crack itself. It is the question that comes next: which best concrete crack filler actually holds up once the weather swings, the concrete moves a little, and you start driving over it again. I have tried a bunch of options over the years on my own projects, and the right pick usually comes down to what kind of crack you are dealing with and how much patience you have for prep work.
Some fillers are quick and clean, and some are messy but tough as nails. A few look great for a month and then shrink, pop loose, or telegraph right back through like the crack is trying to get your attention. In the roundup and the buyer’s guide that follow, I will walk you through the products I have used, what I liked, what I would skip, and how to match the filler to the job so you fix it once and get back to more interesting projects.
Best Concrete Crack Fillers in 2026
| Image | Model | |
|---|---|---|
 | Best Overall Sikaflex Self-LevelingEditor's Choice  Check Price | Check Price |
 | Easiest to Use DAP Liquid CementCheck Price | Check Price |
 | Best Value Sashco Slab SealantCheck Price | Check Price |
 | Best for Large Repairs Rust-Oleum Epoxy PatchCheck Price | Check Price |
 | Strongest Formula PC-Concrete EpoxyCheck Price | Check Price |
 | Best for Foundations RadonSeal Crack KitCheck Price | Check Price |
 | Best for Quick Touch-Ups Red Devil 0645Check Price | Check Price |
1. Sikaflex Self-Leveling Gray Joint Sealant

When I need a cleaner-looking fill on flat concrete cracks and expansion joints, this Sikaflex self-leveling polyurethane is the type of product I reach for. It’s designed to flow out and settle on its own, so instead of fighting to tool a perfect bead, I’m basically guiding it along and letting gravity do the finesse work.
In practice, it behaves like a pourable sealant that finds its way into the joint and evens out without much babysitting. After it cures, it ends up with a flexible, rubbery feel, which is exactly what I want in areas that see movement and weather. The gray color also helps it blend in with a lot of slabs so the repair doesn’t scream for attention.
A couple of real-world notes from my side: this is a horizontal-only kind of crack filler – it’s not meant to cling to vertical gaps. Prep matters too: if the joint is deep, controlling depth (and avoiding wasting sealant) makes a big difference. Also, don’t get too ambitious when cutting the nozzle – a too-large opening can get messy fast because it wants to keep flowing.
Pros:
- Self-leveling behavior makes it easier to get a neat, even finish on flatwork
- Cures into a flexible seal that helps block moisture
- Once cured, it can be finished over (painted, sanded, or stained) if the project calls for it
- Handles outdoor exposure well for typical driveway, sidewalk, and slab joint work
Cons:
- Not the right choice for vertical cracks or joints
- Can be messy if the tip is cut too large or if edges aren’t masked off
2. DAP Liquid Cement Crack Filler, Self-Leveling Gray

When I want to knock out basic concrete crack repairs without breaking out mixing buckets and trowels, this DAP Liquid Cement Crack Filler is the kind of product I reach for. It comes ready to use, and the whole routine is pretty straightforward – I just shake it and pour. On horizontal cracks it naturally settles down into the low spots, which saves a lot of fussing if you are trying to get a neat finish.
In real use, I like it best for driveway, patio, basement floor, and other flatwork cracks where I care more about sealing the gap than doing decorative concrete work. It dries gray and generally blends with typical concrete, but I would not plan on a perfect color match, especially next to older slabs. If I need it to disappear visually, I will keep paint in mind since it can be topcoated with latex or oil-based paints.
Performance-wise, the big selling point is how quickly it can get back into service – concrete repairs can be ready for traffic in about 30 to 45 minutes. That said, I still try to baby it a bit if weather is questionable. Also, it is meant for cracks up to 1/2 in wide, and on anything approaching that size I expect the filler to settle and may plan on a second pass after the first application firms up.
Pros:
- Ready to use – no mixing, no special tools
- Self-leveling behavior helps leave a smoother surface on horizontal cracks
- Fast turnaround – repairs can be ready for traffic in 30 to 45 minutes
- Can be painted with latex or oil-based paint if the gray does not match
Cons:
- Color match is not guaranteed on older or stained concrete
- Near the 1/2 in crack limit, it may take more than one application to fully fill
3. Sashco Slab Gray Concrete Sealant 6-Pack

When I need to seal concrete cracks without ending up with a brittle patch that pops loose the first time the slab moves, I reach for this Sashco Slab sealant. It lays down thick and stays where I put it, which makes it a lot less frustrating than runny fillers that sag out of a joint before you can even tool it.
What I like most is the balance of firmness and give. Once it sets up, it feels solid to the touch, but it still has the flexibility I want for sidewalks, garage slabs, and those little foundation cracks that love to open and close with the seasons. I’ve also found the gray color can blend in nicely with older concrete, so the repair doesn’t scream at you from across the driveway.
The tradeoffs are real, though. If I’m trying to build a big bead, I keep it modest because thicker applications can stay soft. And I plan ahead on cure time – this isn’t a slap-it-in-and-drive-on-it-tomorrow kind of product. It’s also not the cheapest option, but for sealing that keeps doing its job long-term, I can live with that.
Pros:
- Easy to apply and holds its shape without slumping
- Sets firm while still staying flexible for moving slabs
- Good adhesion and suitable for both indoor and outdoor concrete cracks
- Gray color can be a close match on older concrete
Cons:
- Long cure time before it fully hardens
- Thicker beads can stay soft instead of curing hard
4. Rust-Oleum 301012 Epoxy Concrete Patch Kit

When I need a concrete crack filler that isn’t going to shrink back, crumble out, or turn into dust the first time something heavy rolls over it, I reach for this Rust-Oleum two-part epoxy patch. It’s built for indoor or outdoor repairs, and it’s meant for cracks and small holes – basically the stuff that ruins a floor coating job if you ignore it.
In practice, this one feels more like an epoxy repair compound than a “soft” patch. Once it cures, it forms a very hard surface – the kind of repair that can handle abuse and still stay put. That makes it a solid choice if you’re planning to paint or coat your slab afterward, especially since it’s designed to be paintable/coatable after about 8 hours.
The tradeoff is that it’s a little fussy to work with. You’re mixing two parts, and the consistency can be sticky, so I treat it like a small-batch product – mix only what I can place and shape quickly, then come back and mix more. After it sets up, I like that I can sand it or grind it flush to get the surface ready for whatever coating is going on top.
Pros:
- Epoxy bond is designed to be permanent and resist shrinking or cracking
- Cures into an extremely hard repair that can outperform the surrounding concrete
- Works indoors or outdoors, and plays well with concrete coatings
- Can be painted or coated after about 8 hours
Cons:
- Two-part mixing is messier than single-tube fillers and takes some care
- Not the most cost-friendly option if you have lots of large voids to fill
5. PC-Concrete Two-Part Epoxy Crack Repair Paste

When a concrete crack filler needs to do more than just “look filled,” this PC-Concrete two-part epoxy is the kind of stuff I reach for. It’s made for both crack repair and anchoring hardware into concrete and masonry, and it behaves like a real adhesive paste – not a soft, flexible sealant. Once it cures, it’s in the hard-and-tough category, which is exactly what I want for permanent repairs.
On the application side, I like that it’s built for damp environments and can be used vertically. In the real world, that means I’m not forced to wait for a perfect, bone-dry day to get a repair done. You get about 20 minutes of working time at around room temp, then it’s ready for service in roughly 4 hours. That window is usually enough time to tool it in, press it where it needs to go, and clean up before it turns from cooperative to stubborn.
It’s also rated for a wide application temperature range (35 to 115 degrees F), and once cured it’s intended to handle service temps from -20 to +115 degrees F. That matters if the slab or masonry is going to see real seasons. Color-wise, it lands in a concrete gray, but I wouldn’t count on it blending perfectly with a textured slab – I treat it like a structural fix first, cosmetics second.
Pros:
- Two-part epoxy paste that’s suited for both crack filling and anchoring rods/bolts/dowels
- Designed to resist moisture and work in damp conditions, including vertical applications
- Practical working time (20 minutes) with a fast return-to-service cure (about 4 hours at 75 degrees F)
- Wide application and service temperature ranges for indoor or outdoor repairs
Cons:
- Finished look is epoxy-smooth gray – it may not visually match surrounding concrete
- Working time is finite, so I have to stage the job and move with purpose once it’s mixed
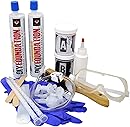
6. RadonSeal DIY Foundation Crack Repair Kit
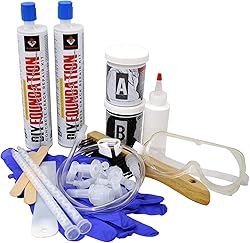
If you’ve got a crack in a poured concrete basement wall and you want a shot at stopping water from the inside without getting into drilling and a bunch of specialty gear, this RadonSeal kit is a solid DIY-friendly approach. The whole idea is low-pressure injection with a standard caulk gun, which is exactly the kind of setup I like for homeowners – simple tools, but a legit repair method when you take your time.
In practice, the “success or failure” comes down to prep and patience. I treat the surface work as the actual job: clean the wall, get the ports set right, and make sure the surface seal around the crack and ports is thorough. If you miss a tiny gap, the expanding urethane will find it and make a mess – fast. Once everything is sealed properly, the injection step is pretty straightforward, and the low-viscosity material is designed to work its way through tight cracks.
I also like that this kit is aimed at the common vertical/diagonal settling-type cracks and lets you work from the interior – no excavation, no wrecking landscaping. And as a bonus, it’s not just about water control – it’s also intended to help block radon and other soil gases where they’d otherwise sneak through that same pathway.
Pros:
- Drill-free injection approach – uses a standard caulk gun for the urethane
- Designed to seal very small cracks and create a long-lasting, flexible seal
- Interior-side repair can avoid costly exterior digging and disruption
- Helps block water intrusion and also acts as a barrier to radon and soil gases
Cons:
- Not recommended for slab/floor cracks or concrete block walls – it’s meant for poured concrete walls
- Horizontal cracks can be structural and may require a pro assessment before attempting a DIY injection repair
7. Red Devil 0645 Premixed Concrete Patch Tube

When I want to fix a small crack or chip without dragging out a bucket and mixing anything, this little squeeze tube is exactly my kind of “grab it and go” solution. It’s pre-mixed, it’s meant for concrete and masonry repairs, and the size makes it handy for those quick jobs where a whole bag of patch is just ridiculous.
Application is straightforward – squeeze it out, push it into the crack, and tool it smooth. Working time feels on the quick side, so I plan the repair, prep my tools, and shape it as I go instead of fiddling with it later. While it’s still fresh, cleanup is simple with soap and water, which I appreciate because I’m not interested in scrubbing dried patch off putty knives.
Color-wise, it dries in the light-to-medium gray range, so it tends to look best on lighter concrete. For deeper voids, I treat it like any patching material and build it in layers rather than trying to pack everything in one go. One important limitation – I don’t use it where car tires are going to live, since it’s not intended for vehicular traffic areas.
Pros:
- Ready to use – no mixing, no dust, no guessing
- Works for interior or exterior concrete and masonry touch-ups
- Water cleanup with soap and water while wet
- Designed to resist shrinking and cracking for a more durable repair
Cons:
- Not recommended for areas exposed to vehicle traffic
- Dries a lighter gray, which may not match darker slabs
Types of Concrete Crack Fillers
You’ve got three main players in the concrete crack filler game, and each one has its own personality. Polyurethane sealants are your workhorses for active cracks that move with temperature changes — think driveways and sidewalks that expand and contract seasonally. They stay flexible after curing, which means they won’t crack out when your concrete decides to do its seasonal dance.
Epoxy fillers are the heavyweights when you need serious structural repair. These babies cure rock-hard and actually add strength to your concrete, but they’re not forgiving if the crack keeps moving. I learned this the hard way on a basement wall that kept shifting — the epoxy held for about six months before it snapped like a pretzel. Save these for stable, non-moving cracks where you need maximum strength.
Then you’ve got your basic concrete crack sealers — usually acrylic or latex-based compounds that sit somewhere in the middle. They’re easier to work with than epoxy but tougher than polyurethane, making them perfect for most residential jobs where you’re not dealing with major structural issues.
Crack Width and Depth Considerations
Here’s where things get real: not all cracks are created equal, and using the wrong filler is like bringing a butter knife to a gunfight. Hairline cracks under 1/8 inch wide can usually handle liquid sealers or thin consistency fillers, but anything wider needs the chunky stuff. I’ve seen too many DIYers try to fill a 1/4-inch crack with watery sealer — it just disappears into the void like money at a casino.
For cracks wider than 1/2 inch, you’re entering structural territory where you might need to pack the crack with backer rod or sand before applying your filler. Don’t try to fill a Grand Canyon-sized crack in one shot — it’ll either take forever to cure or shrink and pull away from the sides. Trust me on this one; I once used an entire tube of expensive polyurethane trying to fill a monster crack without backing it first.
Indoor vs. Outdoor Applications
Indoor concrete is living the easy life compared to outdoor slabs, and your filler choice should reflect that reality. Basement floors and garage slabs don’t have to deal with UV rays cooking them all summer or freeze-thaw cycles turning them into Swiss cheese. You can usually get away with basic acrylic fillers or even simple hydraulic cement for non-moving cracks.
Outdoor concrete is where you need to bring out the big guns. UV resistance and weather durability become non-negotiable features when your repair is going to bake in the sun and freeze in winter. According to research from the Department of Transportation, outdoor sealants face significantly more thermal stress than indoor applications. Polyurethane and modified silicone sealants are your best bets here — they laugh at weather extremes that would make cheaper fillers wave the white flag.
Application Methods and Tools
The delivery system matters more than you might think, and it’s not just about convenience. Squeeze tubes work great for small jobs and give you decent control, but they’ll make your hand cramp up on anything bigger than a few linear feet. Cartridge guns are the sweet spot for most homeowner projects — they give you consistent pressure and let you work at a steady pace without stopping to massage your fingers.
Self-leveling formulas are game-changers for horizontal cracks but terrible for vertical applications where they’ll just run down the wall like tears. I found this out the embarrassing way trying to seal a foundation wall — ended up with more filler on my boots than in the crack. For vertical work, you want a non-sag formula that stays put while it cures.
Clean out your cracks properly before filling — I mean really clean them out. Wire brushes, compressed air, even a shop vac for the stubborn debris. The Federal Highway Administration guidelines emphasize that proper crack preparation is critical for long-term adhesion. A dirty crack is like trying to glue something to a dusty surface; it might stick initially, but it won’t last.
Curing Time and Temperature Requirements
Temperature plays favorites with concrete fillers, and ignoring this will bite you every time. Most fillers have a sweet spot between 50-80°F for application, and going outside this range is asking for trouble. Too cold and they won’t flow properly or cure completely; too hot and they set up before you can tool them smooth. I once tried to seal a driveway crack during a heat wave — the stuff was skinning over before I could finish spreading it.
Plan for longer cure times in cold weather and don’t let rain hit fresh filler for at least 24 hours, regardless of what the package says about “rain-ready” formulas. Mother Nature doesn’t read product labels, and even supposedly waterproof fillers need time to develop their full strength before getting soaked. The U.S. Army Corps of Engineers standards specify minimum cure times that are typically longer than what manufacturers advertise.
Color Matching and Aesthetics
Let’s be honest about color matching — it’s tougher than it looks, and perfect matches are about as rare as unicorns. Most concrete isn’t actually gray; it’s got undertones that vary depending on the aggregate, age, and exposure. Standard gray filler might look perfect wet but dry to a different shade entirely. I’ve had better luck going slightly darker than trying to match exactly, since dirt and weathering will eventually blend things together.
If aesthetics matter for your project, test your chosen filler in an inconspicuous area first. Some fillers can be tinted with colorants, but adding color often affects cure time and performance, so read the fine print carefully. For highly visible areas like front walkways, consider clear sealers that let the natural concrete color show through, or embrace the repair as part of the character — sometimes trying too hard to hide a fix just makes it more obvious.