
If you’ve ever knocked over a glass vase or watched a wine glass take a fatal dive off the counter, you know the heartbreak. Fixing glass might seem like a lost cause, but the right adhesive can make all the difference. The best glue for glass can bond everything from shattered heirlooms to quirky DIY projects, and the results can be surprisingly seamless—if you pick the right one.
Now, I’ve tested my fair share of adhesives. Some left streaks, others peeled off with a sigh. But a few stood out by holding firm, drying clear, and surviving the dishwasher without complaint. Whether you’re repairing a chipped window pane, gluing a mosaic, or assembling a glass terrarium, there’s a product out there that fits the job. Let’s take a look at the ones that actually earned their spot on my shelf.
Best Glue For Glass in 2026
| Image | Model | |
|---|---|---|
 | Best For Glass-To-Glass Repairs Loctite Glass GlueEditor's Choice  Check Price Check Price | Check Price |
 | Best For Wet Or Non-Porous Surfaces Gorilla Max StrengthCheck Price | Check Price |
 | Best For Versatile Craft Bonding E6000 Craft AdhesiveCheck Price | Check Price |
 | Best for Filling and Modeling Repairs Maxi-Cure Extra ThickCheck Price | Check Price |
 | Best for Strong, Fast Repairs Loctite Quick SetCheck Price | Check Price |
 | Best Fast-Setting Clear Epoxy For Glass Repairs J-B Weld ClearWeldCheck Price | Check Price |
 | Best for Mixed-Material Glass Projects Beacon Glass GlueCheck Price | Check Price |
1. Loctite Glass Glue Clear Bond

I’ve used more adhesives than I can count, and when it comes to glass-on-glass jobs, Loctite’s Glass Glue hits the sweet spot. It’s one of the few glues made specifically for glass, and it shows. When I’m fixing a cracked wine glass or piecing together a decorative bowl, this stuff bonds clean and stays nearly invisible. No clamping, no mess — just a crisp, clear finish that looks like nothing ever happened.
The glue locks in place quickly, with a bond that holds up to heat, water, and even the dishwasher — which is a rare win. It’s great for tight repair jobs where you don’t have room to clamp parts together. And it doesn’t blink at tinted or stained glass either, which keeps my options open. Just note: this one’s an indoor glue, so it’s not your pick for outdoor use or big structural fixes.
Pros:
- Specifically designed for bonding glass
- Dries clear for seamless repairs
- Fast-setting and no clamping needed
- Dishwasher safe and heat resistant
Cons:
- Not suitable for outdoor use
- Limited to small repair jobs
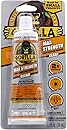
2. Gorilla Max Strength Clear Glue
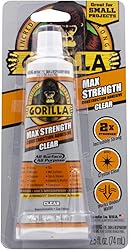
When you’re dealing with glass, or anything slick and stubborn like tile, metal, or even a damp surface, it doesn’t take long to realize that not all glues are up to the task. This Gorilla Max Strength Clear stuff, though? Absolutely holds its own. I’ve used it to reattach glass decor, patch small areas on tile, and fix joints that get wet exposure—and it’s yet to let me down.
The bond is tenacious, especially once cured. I also appreciate that it dries transparently—real handy when you’re working on items that you don’t want looking like they’ve been “fixed.” You do need to work relatively quickly within that 30-minute window before it starts setting, but that’s part of the deal with a high-strength construction adhesive. The viscosity is pretty thick—more like caulk than your typical glue—but it fills gaps well and sticks like crazy when given time to cure. I wouldn’t call it delicate, but for substantial repairs, especially outdoors or on non-porous surfaces, it really shines.
If I had to nitpick, the nozzle design could use refining. It tends to gunk up and doesn’t make storing for later reuse tidy or efficient. Still, with a little planning (and a toothpick or two), it’s manageable. All said, this one’s earned a permanent spot in my toolbox.
Pros:
- Very strong bond on glass, metal, and other smooth or wet surfaces
- Dries clear – great for visible areas
- Waterproof and suitable for indoor/outdoor repairs
- Fills gaps well thanks to thick consistency
Cons:
- Nozzle can clog, making storage between uses tricky
- Too thick for fine, precise work
3. E6000 230010 Craft Adhesive

When I need a glue that’s got muscle but doesn’t scream for attention, I reach for the E6000. I’ve used it on everything from laser-cut wood and acrylic to leather and even ceramics, and let me tell you, it doesn’t back down. This stuff goes on thick, sets clear, and once it cures, it’s basically part of the project. If you’re after strength without sacrificing looks, this one’s a contender.
Now, it’s not a speed demon — you’ll want to let it sit for a solid 24 hours to hit full strength. But the payoff is a flexible, waterproof bond that’s still tough as nails. I also appreciate the precision you can get with the nozzle — it’s easy to keep things clean and controlled, which is key when I’m working on details that need to look sharp. Just make sure you’ve got good airflow, because this glue’s got a nose on it when wet.
Pros:
- Creates a strong, flexible bond across a wide range of materials
- Dries clear to keep projects looking sharp
- Waterproof and weather-resistant once cured
- Precision tip makes it easy to control application
Cons:
- Strong chemical odor during application — don’t skip ventilation
- Needs longer cure time compared to fast-setting adhesives
4. Bob Smith Maxi-Cure Extra Thick
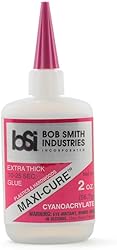
This Bob Smith Maxi-Cure Extra Thick glue is what I’d call the go-to for detail-heavy fixes or projects where a thin, runny adhesive would make a mess of things. Its extra thick formula gives you better control and coverage, especially when you’re looking to fill voids, bond uneven surfaces, or reinforce joints. I’ve used it for those little touch-up repairs on decorative glass and even on multi-material setups where glass meets metal or plastic. The control it gives you during application is spot on — there’s no rushing here, and that’s a good thing when precision matters.
Now, pair it with an accelerator like Insta-Set and you’re speeding up drying time and locking things in fast — that’s where the magic really happens. I’ve even carved, sanded, and shaped it after curing to match contours seamlessly. It’s not just a glue; it behaves like a moldable patch in the right hands. That said, it’s not the first adhesive I’d grab for quick, clear repairs. It cures opaque and isn’t invisible, so don’t expect invisible seams. But in the workshop, especially for modeling or sculpting around glass, it’s got serious value.
Pros:
- Thick formula is ideal for filling gaps and modeling repairs
- Excellent hold on glass and other materials like metal and plastic
- Can be sanded and shaped after curing
- Works incredibly well when paired with an accelerator
Cons:
- Cures opaque — not suitable for transparent or decorative finishes
- Slower dry time without an accelerator
5. Loctite Epoxy Quick Set Syringe
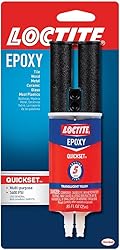
This little dual-syringe tube from Loctite is one of those shop drawer staples I reach for when the job calls for serious bond strength in a hurry. The mixing system’s as easy as it gets—press the plunger and out comes the perfect ratio of resin and hardener, ready to whip into action. The 5-minute working time gives enough wiggle room to adjust pieces before it begins to set, which, let me tell you, has saved a few precious glass and ceramic heirlooms on my watch.
Though it’s a great general-purpose epoxy that holds up on everything from metal to wood, it really shines in those stubborn, uneven glass fixes where a bit of gap filling is needed. And once cured, it’s ready to be sanded, drilled, or painted over. One thing to note, though—there’s no real cap solution, so I use plastic wrap or tape to seal it between uses. Minor hassle for what’s otherwise a rock-solid performer.
Pros:
- Forms a tough, long-lasting bond in just minutes
- Mixes smoothly and evenly with built-in dual syringe
- Good for bonding, gap filling, or even structural repair
- Works well on glass, wood, ceramic, and more
Cons:
- Packaging lacks a proper re-sealable cap
- Not ideal for certain stone or porous substrates
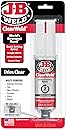
6. J-B Weld ClearWeld 5-Minute Epoxy
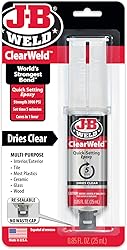
J-B Weld ClearWeld has earned its spot on my workbench for one simple reason: it works fast and dries clear. When you’ve got a cracked vase or a chipped window ornament and you want to fix it without leaving obvious glue lines, this one gets the job done without flashing a neon “repair” sign through your handiwork.
The stuff sets up in about five minutes, which is right in that sweet spot — fast enough to move on with your day, but not so fast that you risk gluing your fingers together right out of the gate. The dual-part syringe design makes it easy to get the mix ratio right, and the resealable cap actually stays put, so you’re not coming back to a goopy mess later on.
I’ve used it on glass, metal, and even a few stray tile pieces around the kitchen. It holds strong, and the clear finish means I can be proud of the fix, not just satisfied it’s holding. Just keep in mind it’s not ideal for wider gaps that need filling — this is more of a precision tool than a gap-filler.
Pros:
- Dries clear and clean — great for visible glass repairs
- Sets quickly in just 5 minutes
- Easy-to-use dual-syringe applicator
- Decent strength for everyday repairs
Cons:
- Not ideal for large gaps or structural fixes
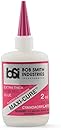
7. Beacon Glass, Metal & More Glue

If you’re someone who dabbles in several types of materials – from glass to metal to plastic and back again – this little bottle from Beacon is worth your notice. I tested it out on a small garden decor made of broken glass tiles, metal wire, and some plastic accent pieces. Everything bonded up nicely, held firm through some summer storms, and looked clean with that transparent finish. It cures fully in a day, which is pretty quick for a heavy-duty adhesive like this.
One thing that stood out to me is the balance of strength and flexibility. It grips fast but still lets you maneuver parts around for the first couple of minutes, which is huge when you’re aligning delicate components like in jewelry-making or mosaics. It holds up well outdoors too – no peeling from heat or moisture. Just remember, this stuff has a chemical smell when wet, so a well-ventilated area is your friend.
Pros:
- Works on a wide variety of materials including glass, metal, and plastic
- Weatherproof and waterproof – great for indoor and outdoor use
- Dries clear and flexible with strong hold
- Useful for both fine detail and larger bonding jobs
Cons:
- Strong fumes when applying – definitely use in a ventilated space
- Needs a full 24 hours to cure completely
What Makes Glass Bonding Different from Everything Else
Here’s the thing about glass – it’s smooth as a baby’s bottom and doesn’t give adhesives much to grab onto. I learned this the hard way when I tried fixing a customer’s cracked windshield with regular epoxy years ago. The repair lasted about as long as my optimism after seeing the result. Glass needs adhesives specifically formulated to bond with non-porous, ultra-smooth surfaces. Regular glues just sit on top like water on a waxed car hood.
The molecular structure of glass creates what we call a “low-energy surface,” which is engineer-speak for “stuff doesn’t want to stick to this.” That’s why you’ll see terms like “glass primer” or “surface preparation” thrown around – sometimes you need to give the adhesive a fighting chance by roughing up or chemically treating the glass first.
UV-Curing vs Chemical-Curing Adhesives
UV-curing adhesives are the rockstars of glass repair, especially for automotive work. I keep a UV light in my toolbox specifically for these jobs because UV adhesives cure crystal clear and create incredibly strong bonds when exposed to ultraviolet light. The downside? They only work where light can reach them, so forget about using them for thick glass assemblies or areas blocked from UV exposure.
Chemical-curing adhesives (like two-part epoxies or cyanoacrylates) work everywhere but often leave you with visible bond lines. They’re your go-to for structural repairs where appearance takes a backseat to strength. Trust me, I’ve used both extensively, and each has its place in a proper glass repair arsenal.
Strength Requirements: Structural vs Cosmetic
Not all glass repairs are created equal. Fixing a decorative vase calls for different adhesive properties than repairing a car’s rear window. Structural applications need adhesives with high tensile strength and impact resistance, while cosmetic repairs prioritize optical clarity and invisible bond lines.
For automotive glass, you’re dealing with thermal expansion, vibration, and weather exposure. I once had a customer come back three months after a cheap repair job because the bond failed during a Texas summer heat wave. The adhesive couldn’t handle the thermal stress, and the repair popped like a champagne cork.
Surface Preparation: The Make-or-Break Step
This is where most DIY repairs go south faster than a tourist in downtown Detroit. Glass might look clean, but it’s covered in invisible oils, residues, and microscopic contaminants that kill adhesive bonds. I always start with isopropyl alcohol (90% or higher) and lint-free cloths – paper towels leave fibers that create weak spots in the bond.
The glass surface must be completely dry before applying any adhesive. Moisture is the enemy of most glass adhesives, creating bubbles, weak spots, and cloudy bonds. I learned this during my early days when humidity ruined what should have been a perfect windshield repair. Now I wait for ideal conditions or use a heat gun to ensure complete dryness.
Temperature and Humidity Considerations
Weather matters more than you’d think with glass adhesives. Most perform best between 65-75°F with low humidity. I’ve seen perfectly good repairs fail because someone tried to fix their windshield during a Florida thunderstorm. Cold weather slows curing times dramatically, while excessive heat can cause adhesives to cure too quickly, creating brittle bonds.
Humidity wreaks havoc on cyanoacrylate-based glass adhesives, causing them to cure prematurely or create white, chalky residues. If you’re working in less-than-ideal conditions, consider using a dehumidifier or waiting for better weather. Your patience will pay off with a stronger, clearer repair.
Application Techniques That Actually Work
Here’s something they don’t tell you in the instruction manuals: less is almost always more with glass adhesives. Heavy application creates thick bond lines that are both ugly and weak. I use a technique I call “controlled flooding” – apply just enough adhesive to completely fill the crack or gap without overflow.
For crack repairs, I start at one end and work slowly toward the other, allowing the adhesive to flow into the damage naturally. Rushing this process traps air bubbles that show up like neon signs against clear glass. Take your time, use good lighting, and don’t be afraid to start over if things go sideways.
- Clean the glass surface with 90%+ isopropyl alcohol
- Ensure complete dryness before application
- Apply adhesive in thin, even layers
- Work slowly to avoid trapping air bubbles
Curing Time Reality Check
Ignore the “sets in 30 seconds” marketing nonsense. True structural strength takes hours or even days to develop, depending on the adhesive type and environmental conditions. I always tell customers to avoid stressing repaired glass for at least 24 hours, regardless of what the package claims about initial set time.
UV adhesives are the exception here – they cure rapidly under proper UV light but still benefit from additional time to reach full strength. I’ve tested repairs immediately after UV curing and found they’re only at about 60% of their ultimate strength. Patience pays off with glass work more than almost any other repair.