
If you have a crack in a driveway, garage slab, basement floor, or walkway, you already know the annoying part is not the crack itself. It’s the question that comes next: which filler actually holds up once the weather swings, the concrete moves a little, and you start driving over it again. I have tried a bunch of options over the years on my own projects, and the right pick usually comes down to what kind of crack you are dealing with and how much patience you have for prep work.
Some fillers are quick and clean, some are messy but tough as nails. A few look great for a month and then shrink, pop loose, or telegraph right back through like the crack is trying to get your attention. In the roundup below, I walk through what held up in real-world use and what I would only trust for a temporary fix, so you can match the filler to the job and stop patching the same crack twice a year.
Best Concrete Crack Fillers in 2026
| Image | Model | |
|---|---|---|
 | Best Overall Sikaflex Self-LevelingEditor's Choice  Check Price | Check Price |
 | Easiest to Use DAP Liquid CementCheck Price | Check Price |
 | Best Value Sashco Slab SealantCheck Price | Check Price |
 | Best for Large Repairs Rust-Oleum Epoxy PatchCheck Price | Check Price |
 | Strongest Formula PC-Concrete EpoxyCheck Price | Check Price |
 | Best for Foundations RadonSeal Crack KitCheck Price | Check Price |
 | Best for Quick Touch-Ups Red Devil 0645Check Price | Check Price |
1. Sikaflex Self-Leveling Gray Joint Sealant

This polyurethane sealant earns the top spot for one reason: it does the hard part for you. Pour it into a horizontal crack or expansion joint, and it finds its own level — no fighting to tool a perfect bead, no constantly smoothing and re-smoothing. Gravity does the finesse work.
After it cures, the result is a flexible, rubbery seal with ±25% movement capability, which is exactly what driveways and sidewalks need when they expand and contract through the seasons. Application temperature range runs from 40°F to 100°F, and full cure takes roughly 3 to 5 days at 73°F. The gray color blends with most standard slabs without screaming “repair.”
A few things I learned the messy way: this is horizontal-only. Don’t try it on a wall — it’ll run right off. If the joint is deep, use backer rod to control depth and avoid wasting half the tube filling dead space. And go easy cutting the nozzle. Too large an opening and the sealant keeps flowing whether you want it to or not.
Pros:
- Self-leveling behavior makes it easier to get a neat, even finish on flatwork
- Flexible ±25% movement capability handles seasonal concrete expansion
- Once cured, it can be painted, sanded, or stained if needed
- Handles outdoor exposure well for driveway, sidewalk, and slab joint work
Cons:
- Not the right choice for vertical cracks or joints — it will run
- Full cure takes 3–5 days, so plan around weather
2. DAP Liquid Cement Crack Filler, Self-Leveling Gray

Shake and pour. That’s the whole process. No mixing buckets, no trowels, no two-part anything — just a bottle that you tip into the crack and let settle. For someone who wants to seal a driveway or patio crack without turning it into a project, the DAP is about as low-effort as it gets.
Like the Sikaflex above, it self-levels on horizontal surfaces, which saves a lot of fussing if you’re after a neat finish. Where it differs is speed: concrete repairs can be ready for foot traffic in about 30 to 45 minutes. That’s dramatically faster than the Sikaflex’s multi-day cure. The tradeoff is that this is a simpler formula — it doesn’t have the same polyurethane flexibility or movement capability, so it’s better suited for stable cracks that aren’t actively opening and closing.
It dries gray but I wouldn’t bet on a perfect color match, especially on older slabs. Paintable with latex or oil-based paints if the mismatch bugs you. For cracks approaching the 1/2-inch width limit, plan on a second pass after the first application settles — it’ll sink into the void more than you expect.
Pros:
- Ready to use — no mixing, no special tools
- Self-leveling behavior helps leave a smoother surface on horizontal cracks
- Fast turnaround — ready for traffic in 30 to 45 minutes
- Can be painted if the gray doesn’t match
Cons:
- Color match is not guaranteed on older or stained concrete
- Near the 1/2-inch crack limit, it often takes more than one application to fully fill
3. Sashco Slab Gray Concrete Sealant 6-Pack

Six tubes in the box. That matters, because once you start walking a property looking for cracks, you find a lot more than you expected. The per-tube cost in this 6-pack undercuts buying individual cartridges of most competitors, and the product inside is genuinely good — not a budget compromise.
The Sashco Slab is a 100% acrylic latex sealant that stretches up to 300% of the original crack width. That blew my mind, honestly. It handles gaps up to 3 inches wide without slumping, and the service temperature range runs from -30°F to +250°F, which is wider than any polyurethane in this roundup — including the Sikaflex. It also has a concrete-like texture to the finish, so repairs blend in rather than sitting on top like a shiny caulk line.
The catch is cure time. It begins to harden in under 30 minutes, but full cure takes about a week depending on temperature and humidity. That’s significantly longer than the DAP’s 30-minute walkability. Thick beads can stay soft even longer. This isn’t a slap-it-and-forget-it product — but the payoff is a repair that actually flexes with the slab instead of cracking out next spring.
Pros:
- 6-pack format keeps per-tube cost lower than most single-buy alternatives
- 300% elasticity and adhesion designed for moving concrete cracks
- Handles gaps up to 3 inches wide — far beyond most sealants
- Textured gray finish blends with aged concrete
Cons:
- Full cure takes roughly a week — not a quick turnaround
- Thicker beads can stay soft instead of curing firm
4. Rust-Oleum 301012 Epoxy Concrete Patch Kit

The products above are sealants — they fill cracks and stay flexible. This Rust-Oleum is something different. It’s a two-part epoxy patch that cures rock-hard, and it’s meant for the kind of damage where “sealing” isn’t enough. Crumbled edges, small holes, broken-out sections — the stuff that ruins a floor coating job if you ignore it.
Once cured, this repair can actually outperform the surrounding concrete in terms of hardness. That’s the upside of epoxy: it doesn’t just fill, it adds real structure. It’s paintable/coatable after about 8 hours, so if you’re prepping a garage floor for an epoxy coating or paint system, this is the step that makes the finish look professional instead of patchy.
The downside is that it’s fussy. Two parts, sticky consistency, limited working time. I mix small batches — only what I can place and shape in a few minutes — then come back for more. And because it cures rigid, it’s not the right pick for active cracks that move. For that, the Sikaflex or Sashco above are better choices. After the Rust-Oleum sets, I can sand or grind it flush, which none of the flexible sealants allow.
Pros:
- Epoxy bond resists shrinking, cracking, and crumbling
- Cures extremely hard — can outperform the surrounding concrete
- Works indoors or outdoors and plays well with floor coatings
- Can be painted or coated after about 8 hours
Cons:
- Two-part mixing is messier than single-tube fillers and takes care
- Rigid cure means it’s wrong for active, moving cracks
5. PC-Concrete Two-Part Epoxy Crack Repair Paste

The numbers on this one tell the story. Compressive strength over 10,900 PSI. Tensile strength of 6,790 PSI. For context, typical residential concrete runs 3,000–4,000 PSI compressive — this epoxy paste is genuinely stronger than what it’s repairing. That’s why I call it the strongest formula in this list, and it’s not even close.
Beyond crack filling, it doubles as an anchoring adhesive for setting bolts, rods, and dowels into concrete and masonry. The non-sag paste consistency means I can use it vertically — something neither the Sikaflex nor the DAP can do. It works in damp conditions too, so I’m not stuck waiting for a bone-dry day to get a repair done. Working time is about 20 minutes at room temperature, and it’s ready for service in roughly 4 hours. Compare that to the Rust-Oleum’s 8-hour paint window, and the PC-Concrete gets you back in business faster.
Service temperature range runs -20°F to +115°F, and the application window is 35°F to 115°F. Color lands in a concrete gray — not a perfect cosmetic match on textured slabs, but this is a structural fix first. If looks matter more than strength, the Sashco’s textured finish is better suited for that.
Pros:
- Over 10,900 PSI compressive strength — stronger than most residential concrete
- Non-sag paste works on vertical surfaces and in damp conditions
- 20-minute working time with fast 4-hour return to service
- Doubles as anchoring adhesive for bolts, rods, and dowels
Cons:
- Epoxy-smooth gray finish won’t visually match textured or aged concrete
- Rigid cure — not suited for cracks that are still actively moving
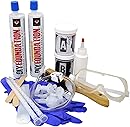
6. RadonSeal DIY Foundation Crack Repair Kit
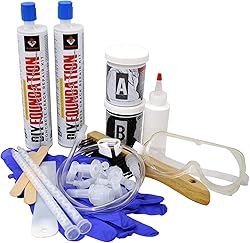
Every other product on this list goes on the surface. This one goes through it. The RadonSeal kit is a low-pressure urethane injection system for poured concrete basement walls — you inject the sealant from the inside and it works through the full depth of the crack. No digging up the foundation, no wrecking landscaping.
The setup uses a standard caulk gun, which keeps it DIY-friendly. But I’ll be upfront: the success-or-failure moment is the prep, not the injection. Ports need to be set right, the surface seal around the crack has to be thorough, and if you miss a tiny gap, the expanding urethane finds it and makes a mess. Fast. Once everything is sealed properly though, the injection itself is straightforward, and the low-viscosity material works its way through cracks you can barely see.
It also blocks radon and soil gases, which is a nice bonus if your basement tested high. Where it doesn’t belong: slab cracks, floor cracks, or concrete block walls. It’s specifically designed for poured concrete walls with vertical or diagonal settling cracks. Horizontal cracks in foundations can be structural — if you see one, talk to an engineer before grabbing a caulk gun. The surface-applied products above (especially the PC-Concrete for strength or the Sashco for flexibility) are better suited for slab and floor work.
Pros:
- Injection approach seals the full depth of the crack, not just the surface
- Uses a standard caulk gun — no specialized drilling equipment
- Interior-side repair avoids costly exterior excavation
- Blocks water intrusion plus radon and soil gases
Cons:
- Only for poured concrete walls — not slabs, floors, or block construction
- Horizontal foundation cracks may be structural and need professional assessment first
7. Red Devil 0645 Premixed Concrete Patch Tube

A squeeze tube. That’s it. No caulk gun, no mixing, no measuring — just twist the cap and go. For small chips, hairline cracks, and minor concrete touch-ups, the Red Devil is the lowest-effort option on this list by a wide margin.
Squeeze it out, push it into the crack, tool it smooth. Working time feels quick, so I prep everything first and shape as I go rather than coming back to fiddle with it after. Cleanup is soap and water while it’s still wet, which I appreciate more than I probably should. Color is a lighter gray, so it plays best on newer or lighter-colored concrete. On a dark aged slab it’ll stand out.
Here’s the important limitation: it’s not rated for vehicular traffic. Driveways are out. If you need something cars can drive over, the DAP or the Sikaflex above are the right picks. For steps, patios, basement floor chips, and walkway touch-ups though, this little tube handles the job without any drama. Build deep fills in layers rather than trying to pack everything in one shot — same rule as any patching material.
Pros:
- Ready to use — no mixing, no tools, no dust
- Works for interior or exterior concrete and masonry touch-ups
- Soap and water cleanup while still wet
- Resists shrinking and cracking for a more durable small repair
Cons:
- Not for areas with vehicle traffic — the DAP or Sikaflex are better for driveways
- Lighter gray color may not match darker or aged slabs
Types of Concrete Crack Fillers
Three main categories, and picking the wrong one is the fastest way to redo a repair. Polyurethane sealants are your workhorses for active cracks that move with temperature changes — the Sikaflex in this roundup is a classic example. They stay flexible after curing, which means they won’t crack out when your concrete does its seasonal expansion dance.
Epoxy fillers are the heavyweights for structural work. The PC-Concrete and Rust-Oleum above both fall here. They cure rock-hard and add real strength, but they’re not forgiving if the crack keeps shifting. I learned this on a basement wall that kept moving — the epoxy held for about six months before it snapped clean through. Save rigid epoxies for stable cracks where you need maximum strength and plan to sand or coat over the repair.
Then there’s acrylic latex — the Sashco Slab’s category. Water-based, easy cleanup, no harsh fumes. They land somewhere between polyurethane flexibility and epoxy rigidity, and for most residential crack work where you’re not dealing with major structural issues, they get the job done with less hassle than either of the other two.
Crack Width and Depth Considerations
Not all cracks deserve the same product, and using the wrong filler for the size is a guaranteed callback. Hairline cracks under 1/8 inch wide can usually handle liquid sealers or thin consistency fillers like the DAP — just pour and let it settle. The wider you go, the pickier you need to be. A watery sealer poured into a 1/4-inch crack just disappears into the void and you’ve wasted product.
For cracks wider than 1/2 inch, pack with backer rod or sand before applying filler on top. This saves material and gives the sealant something to grip against instead of just sinking. The Sashco handles gaps up to a full 3 inches wide, which is far beyond what most products in this roundup can manage — but even with the Sashco, I’d use backer rod on anything over an inch deep. Don’t try to fill a deep crack in one shot. It either takes forever to cure or shrinks and pulls away from the sides.
Indoor vs. Outdoor Applications
Indoor concrete has it easy. No UV, no rain, no freeze-thaw cycles. Basement floors and garage slabs can get away with simpler acrylic fillers or even hydraulic cement for non-moving cracks. The Red Devil squeeze tube is perfect for this kind of low-stakes interior touch-up.
Outdoor concrete is a different fight. UV resistance and weather durability become non-negotiable when the repair bakes in summer sun and freezes in winter. According to Department of Transportation research, outdoor sealants face significantly more thermal stress than indoor applications. Polyurethane sealants like the Sikaflex and high-elasticity acrylics like the Sashco are built for this — the Sashco’s service range of -30°F to +250°F gives you coverage most products can’t touch.
Application Methods and Tools
Delivery method matters more than people think. Squeeze tubes — like the Red Devil — work great for small touch-ups and give decent control, but your hand cramps fast on anything bigger than a few feet. Cartridge guns are the sweet spot for most homeowner projects. Consistent pressure, steady pace, and you’re not stopping every thirty seconds to massage your fingers back to life.
Self-leveling formulas are game-changers for horizontal cracks but useless on vertical surfaces where they run straight down the wall. The Sikaflex and DAP are both self-leveling — great on flatwork, don’t even try them on a foundation wall. For vertical work, non-sag formulas like the PC-Concrete paste or the Sashco Slab stay put while they cure.
Clean your cracks before filling. Really clean them. Wire brush, compressed air, shop vac for stubborn debris. Every product manufacturer says it, and they’re not wrong — crack preparation is the single biggest factor in long-term adhesion. A dirty crack is a failed bond waiting to happen, doesn’t matter how good the product is.
Curing Time and Temperature Requirements
Temperature plays favorites with every product in this roundup. Most fillers work best between 50–80°F for application. Too cold and they won’t flow or cure properly. Too hot and they skin over before you can tool them — I tried sealing a driveway crack during a heat wave once and the Sikaflex was setting up before I could finish spreading it.
The speed differences between products are huge. The DAP is walkable in 30 minutes. The PC-Concrete epoxy is service-ready in 4 hours. The Rust-Oleum needs 8 hours before coating. The Sashco takes a full week for complete cure. Picking the wrong cure profile for your timeline means either rushing a repair or blocking off your driveway for days.
Don’t let rain hit fresh filler for at least 24 hours, regardless of what the package says about “rain-ready” formulas. Even products with good early water resistance need time to develop full strength before getting soaked. The U.S. Army Corps of Engineers standards specify minimum cure times that are typically longer than what manufacturers advertise. Plan around the forecast, not the label.
Color Matching and Aesthetics
Perfect color matches are mostly a fantasy. Concrete isn’t one shade of gray — it has undertones that shift with aggregate, age, sun exposure, and staining. A filler can look perfect wet and dry to a completely different shade. I’ve had better luck going slightly darker, because dirt and weathering eventually bring things closer together anyway.
If aesthetics are a priority, the Sashco Slab has an advantage here — its textured finish mimics aged concrete rather than sitting on top as a smooth, shiny bead. The epoxies (Rust-Oleum and PC-Concrete) cure smooth and tend to look obviously different from the surrounding surface. Some fillers accept colorants, but tinting often affects cure time and performance, so read the specs before experimenting. For visible areas like front walkways, test in a hidden spot first. And sometimes the smartest move is to stop fighting the color match and just accept the repair as part of the slab’s character.