
Ceilings are the one place I never want surprises. One wrong pick and you are staring at lap marks, roller fuzz, and weird shine every time the light hits just right. After a lot of real world rolling in bedrooms, hallways, and more than a few patched up water stain situations, I learned that the best paint for a ceiling is not always the same paint you would happily slap on a wall.
Some cans level out like they were born for overhead work, and some fight you the whole way, dripping, flashing, or showing every touch up like a fingerprint. In the roundup below, I will walk through the options that actually behaved on a ceiling, what I liked, what I did not, and the small details that save your neck and your Saturday.
Stick with me, because the difference between a clean, invisible finish and a ceiling that looks slightly haunted usually comes down to a couple choices nobody thinks about until the roller is already loaded.
Best Paints For Ceilings in 2026
| Image | Model | |
|---|---|---|
 | Best Overall KILZ Ceiling PaintEditor's Choice  Check Price | Check Price |
 | Runner-Up Prestige Ceiling PaintCheck Price | Check Price |
 | Best Budget Glidden Ceiling PaintCheck Price | Check Price |
 | Best for Easy Application INSL-X Color-ChangingCheck Price | Check Price |
 | Best for Touch-Ups Zinsser Covers UpCheck Price | Check Price |
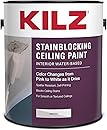
1. KILZ Stainblocking Ceiling Paint With Color Indicator

If the ceiling has a history – water rings, smoke shadows, or that mysterious yellow patch nobody wants to talk about – this is the can I reach for first. KILZ built this one around stainblocking, and that’s where it actually separates from a regular ceiling white. As a bonus, it goes on with a light pink tint that shifts to white as it dries, so tracking my wet edge overhead is easier than usual.
Working time is practical for a typical room: it’s dry to the touch in about an hour, and I can plan on a recoat in around two hours. When I’m using it specifically for stain control, I give it more time before recoating – that’s where the stainblocking behavior is meant to shine. Cleanup is straightforward with soap and water, which I appreciate after spending a day rolling overhead.
It’s also built for ceiling reality: the formula is made to resist spatter and it doesn’t bring a heavy odor into the room. Coverage depends a lot on the surface – I expect less square footage on porous ceilings and more on smoother ones – and I keep in mind that stubborn or darker stains may still need a second coat to fully disappear.
Pros:
- Pink-to-white dry indicator helps me keep an even, consistent pass
- Fast dry and recoat schedule fits well into a same-day ceiling job
- Designed to reduce spatter and keep odor low while rolling overhead
- Soap-and-water cleanup keeps the end of the job simple
Cons:
- Some ceilings still need multiple coats for complete hiding
- For maximum stainblocking, I have to wait longer before recoating
2. Prestige Interior Ceiling Paint In Brite White

A ceiling paint earns its spot in my rotation the boring way – by rolling on clean, not flinging micro-droplets across the room, and letting me breathe while I work. This Prestige interior ceiling paint does all three without any drama. It’s an acrylic latex with low VOC, and it cleans up with simple soap and water – exactly what I want at the end of a long day on a ladder.
On application, it behaves like a ceiling paint should. I get a smooth laydown and noticeably less spatter than the bargain stuff that tends to pepper floors and face alike. It’s designed for previously painted or properly prepped and primed ceilings (including acoustical tiles), and it’s straightforward to work with using a 3/8-inch nap roller, brush, or pad. Dry time is quick – about an hour to dry, with recoats after about four hours if needed.
The one place I keep my expectations realistic is color. It’s labeled “Brite White,” but I’ve run into cases where “white” reads cooler than expected when compared side-by-side with a true bright flat white. If you’re matching an existing ceiling or trim, I’d rather you find out with a small test area than after you’ve cut in the whole room.
Pros:
- Low spatter and smooth rolling – makes ceiling work less of a circus act
- Low VOC and soap-and-water cleanup
- Works on properly prepared ceilings, including acoustical tiles
- Fast dry time for moving a job along
Cons:
- “White” can read cooler than expected depending on what you’re matching to
- Best results on new surfaces typically mean priming and planning on two coats
3. Glidden Grab-N-Go Flat White Ceiling Paint

Most budget ceiling paints make me nervous – cheap formula usually means more spatter, thinner coverage, and a finish that tattles on every lap line. This Glidden ceiling paint pushes back on that reputation with a flat sheen that helps disguise the usual ceiling flaws and a formula that’s meant to keep spatter under control.
On a properly prepped ceiling, it lays down evenly and does a good job hiding old dullness and spot repairs. It also fits the way I like to work overhead – it sets up quickly, so I’m not waiting all day to get a second coat on if I need it. For most average ceilings, a gallon covers a good chunk of space, right in that typical room-or-two range.
One honest caution: the “white” here can read a bit less bright than some folks expect, especially next to a very crisp, stark ceiling white. That’s not a dealbreaker if you’re repainting the whole ceiling or matching a slightly softer white – but for small touch-ups on an ultra-bright ceiling, you might notice the difference.
Pros:
- Flat finish helps mask minor ceiling imperfections
- Good hiding power for refreshing tired ceilings and covering spots
- Lower-spatter behavior makes overhead rolling less messy
- Dries fast and can be recoated the same day
Cons:
- Spot touch-ups on an existing bright-white ceiling can stand out — best results come from recoating the whole surface
- Delivery can be messy if the can isn’t packaged well
4. INSL-X Color-Changing Flat Ceiling Paint

When I’m painting a ceiling, my biggest enemy isn’t the roller – it’s missed lap lines hiding in plain sight. This INSL-X ceiling paint tackles that with a color-shift trick: it goes on with a pink cast and then dries to white. In practice, that makes it easier to track my wet edge and see where I’ve been, especially on big ceilings where the lighting loves to lie to you.
The finish dries down flat white, which is exactly what I want overhead because it helps keep surface flaws from calling attention to themselves. It’s also water-based, so cleanup is straightforward with soap and water. Dry time is friendly too – I can come back for another pass in about two hours when needed, which keeps a ceiling job from dragging into tomorrow.
That said, I don’t treat the pink cue as a neon sign. Depending on the situation, it can read pretty subtle – and if I’m trying to hide stains from past leaks, I don’t expect this paint alone to do that job without proper prep. That’s really the dividing line between this and the KILZ above: KILZ is built to seal and block old marks, while this INSL-X is purely about even, consistent coverage on ceilings that don’t need stain muscle. For normal ceilings – smooth or textured – it’s a solid, practical pick when I want a flat white and a little extra help keeping my passes honest.
Pros:
- Color-change effect helps me track coverage and reduce missed spots
- Flat white finish is well-suited to ceilings and helps downplay minor imperfections
- Fast recoat window (as little as two hours) keeps the job moving
- Soap-and-water cleanup makes end-of-day cleanup easier
Cons:
- The pink indicator can be fairly light, so it may not stand out as much as I’d like
- Not a substitute for stain-blocking prep when covering water marks
5. Zinsser Covers Up Ceiling Stain Sealing Spray

When I run into those classic ceiling headaches – old water rings, a dingy spot, or a mystery stain that makes the whole room look tired – this is the kind of can I like to have close by. It’s a ceiling-focused paint and primer in one, and the whole point is speed: aim it up, fog the problem area, and move on with your day.
The upward-oriented spray pattern makes overhead work less of a circus act. On stains, I get the kind of coverage that saves me from dragging out separate primer and paint for small repairs. The finish lands in that flat white neighborhood that blends with a lot of ceilings, including tiles, without calling attention to the patch.
Fair warning, though: aerosols travel. The spray can throw a wide area and create a fine mist that settles where you didn’t plan, so I treat masking and drop protection as mandatory – especially near walls, alarms, and anything I don’t want lightly dusted in white. Ventilation matters too, particularly if the touch-up starts turning into a bigger section.
Pros:
- Great option for quick ceiling touch-ups without rolling and cutting in
- Covers common ceiling stains effectively in a single step (paint + primer)
- Upward spray design is more comfortable for overhead work
- Flat white look blends well with many ceilings and tiles
Cons:
- Fine overspray can drift and settle around the room if I don’t mask carefully
- Fumes and airborne mist mean I need solid ventilation for anything beyond a tiny spot
What to Look for When Buying Ceiling Paint
Paint Sheen: Your First Major Decision
Trust me on this one – flat or matte finish is your best friend for ceilings. I learned this the hard way after using eggshell on a bedroom ceiling and watching every single roller mark show up like a neon sign. Flat paint hides imperfections, doesn’t create glare, and gives you that classic smooth ceiling look everyone expects. Save the satin and semi-gloss for walls and trim where you actually want some sheen.
The only exception? Bathrooms and kitchens where you might need to scrub the ceiling occasionally. In those cases, eggshell can work, but honestly, if you’re scrubbing your ceiling regularly, you’ve got bigger problems than paint sheen.
Coverage and Hide: The Real Performance Test
Here’s where most people get burned – they buy cheap paint thinking “it’s just a ceiling, who cares?” Then they end up doing three coats instead of two, spending more time and money than if they’d bought quality paint upfront. Good ceiling paint should cover in two coats, period. Look for paints specifically labeled as “one-coat” or “high-hide” – they usually contain more titanium dioxide, which is what actually covers your old paint.
I once helped a buddy paint his living room ceiling with some bargain paint from a big box store. Four coats later, we could still see patches of the old yellow paint bleeding through. Don’t be that guy.
Spatter Resistance: Your Back Will Thank You
Spatter-resistant formulas are genuinely worth the extra few bucks, especially if you’re rolling overhead. These paints are thicker and designed to stay on the roller instead of decorating you and your floor. Benjamin Moore and Sherwin-Williams both make excellent spatter-resistant ceiling paints – I’ve tested them in my own renovations – but they’re typically only sold through dealers or brand-specific stores, so I kept this roundup focused on options you can order online without hunting around.
Color Considerations Beyond Basic White
Yeah, white is classic, but here’s something most people don’t realize – pure bright white can actually look harsh under certain lighting. Slightly off-white or warm white colors often look better and more natural. If your walls are a warm color, a ceiling that’s too cool-white will clash like crazy.
Darker ceilings can work in the right space, but they require more light to avoid feeling cave-like. I painted my home office ceiling a soft gray, and it actually makes the room feel more intimate and focused. Just make sure you have enough artificial lighting to compensate.
Key Features to Prioritize:
- Flat or matte finish for most applications
- High-hide formula to minimize coat count
- Spatter-resistant properties for easier application
- Low-VOC formula for better indoor air quality
Application Tips That Actually Matter
Use a quality roller with a 3/8-inch nap – not too thick, not too thin. Those cheap foam rollers will leave texture marks that’ll drive you nuts every time you look up. Also, invest in an extension pole even if you think you can reach. Your neck and shoulders will thank you, and you’ll get better, more consistent coverage.
Cut in the edges first with a quality angled brush, then roll the main area in overlapping W patterns. Work in sections small enough that the cut-in edges stay wet while you’re rolling – this prevents those annoying lap marks that show up when paint dries at different rates.